Update for X-Plane 11
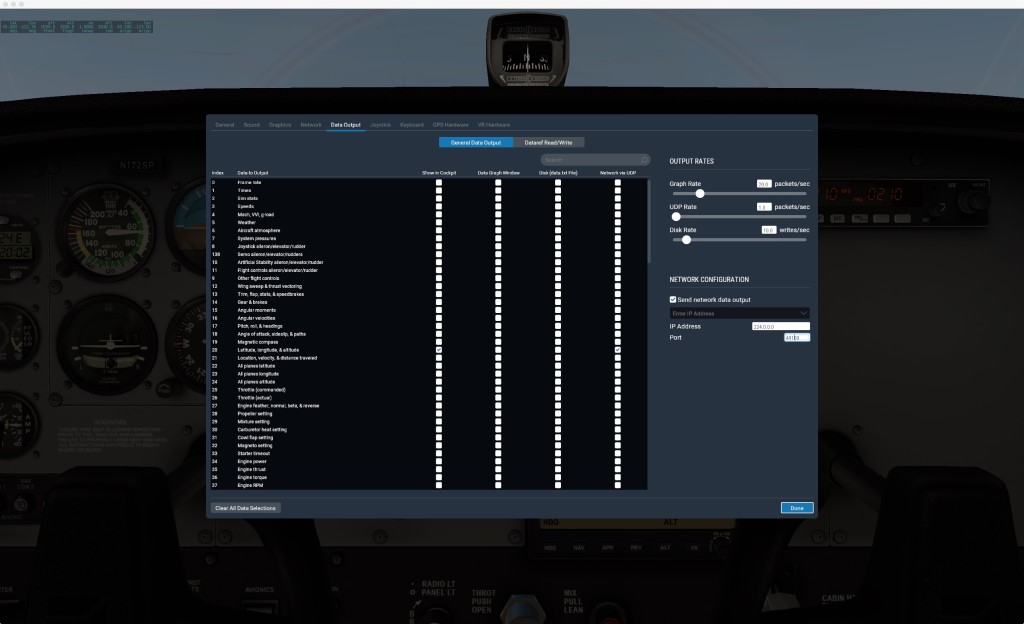
You now find the setup page under Settings->Data Output
Remember to click the ‘Send network data output’, then add
IP=224.0.0.0 and Port=49100

Update for X-Plane 10
The setting pages now have more options, but the same data is still there.
Just leave the other setup pages blank. If you DO see something selected, please unselect it (this can happen when upgrading from X-Plane 9 to 10 in same directory).
The port page is now called Settings->Net Connections>Data
Please follow the setup below to fly X-Plane and have SkyCharts track along!
In order to do so, check the screen shots at the end and make sure you have the same settings.
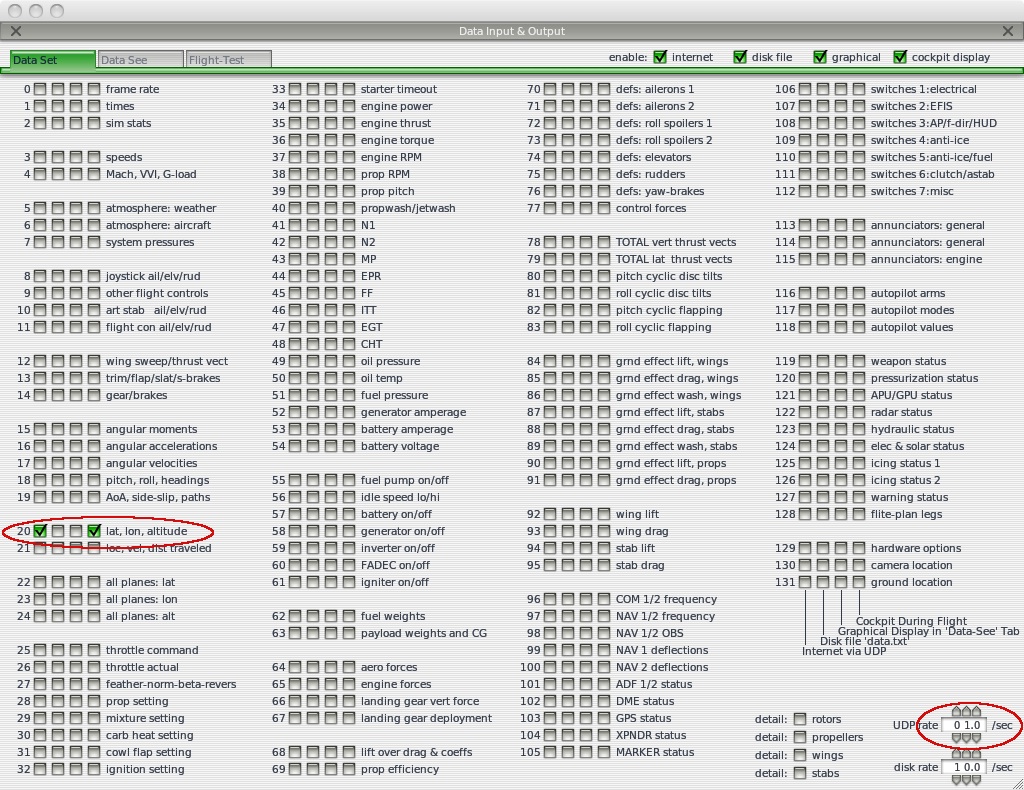
Settings->Data Input & Output>DataSet
Select the first check box (internet) on 20: lat,lon,altitude. You can also set the 4th box (cockpit display) to verify. In the right corner set UDP rate to 1.0/sec. Faster will not improve speed, in fact the opposite will happen since SkyCharts has to process the received data.
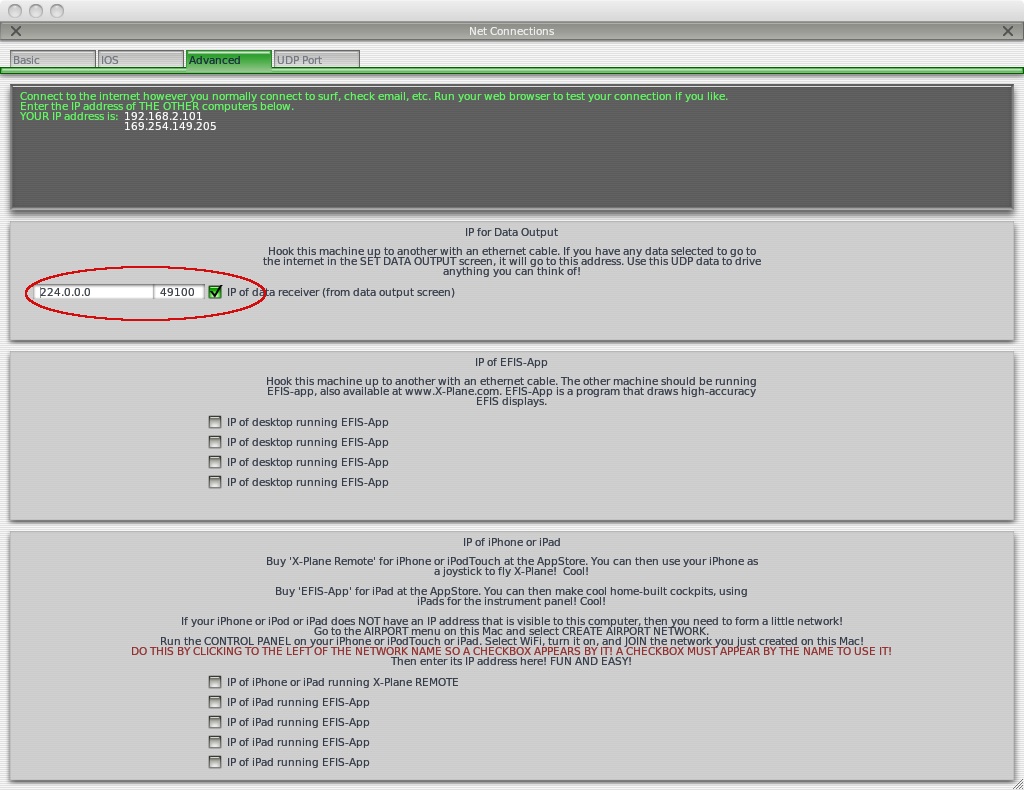
Settings->Net Connections>Advanced
Type in IP=224.0.0.0 Port=49100. NOTE: The port is different from default. If multicast (224.0.0.0) does NOT work (your router may not support multicast) then try using YOUR IP in the box above, or change the router setting. Here is how to find YOUR IP (find the blurred number in the image, and replace with it is in your case).
Settings->Net Connections>IOS
Leave unchanged.
Settings->Net Connections->Basic
Leave unchanged.
Now fly!
SkyCharts should just pick up the coordinate from X-Plane, nothing needs to be done in SkyCharts. When you are done, quit X-Plane and SkyCharts will revert to the internal GPS after 20 seconds.
Hint: Press the gps lock button and SkyCharts will always keep the location centered.
If you don’t have X-Plane, try the demo version:
http://www.x-plane.com/demo.html


